Get Started
Make sure you’ve downloaded and installed the AutoFlow Studio desktop app. When you’re ready, open the AutoFlow Studio desktop app and record your first test.1. Click on ‘Create Test’
Click on the ‘Create Test’ button as shown in the image.

2. Enter the Test Suite Name
Enter the name of your test suite.
3. Select Device Profile, Choose the environment and enter the URL
- Choose your Test Suite:
- Choose your environment:
- Select your device profile:
- Desktop
- Mobile
- Tablet
- Enter the URL of your application

4. Enter the Intent of your test
Write the intent of your test or select one of our AI generated suggestions.
5. Click Submit
Click on ‘Submit’.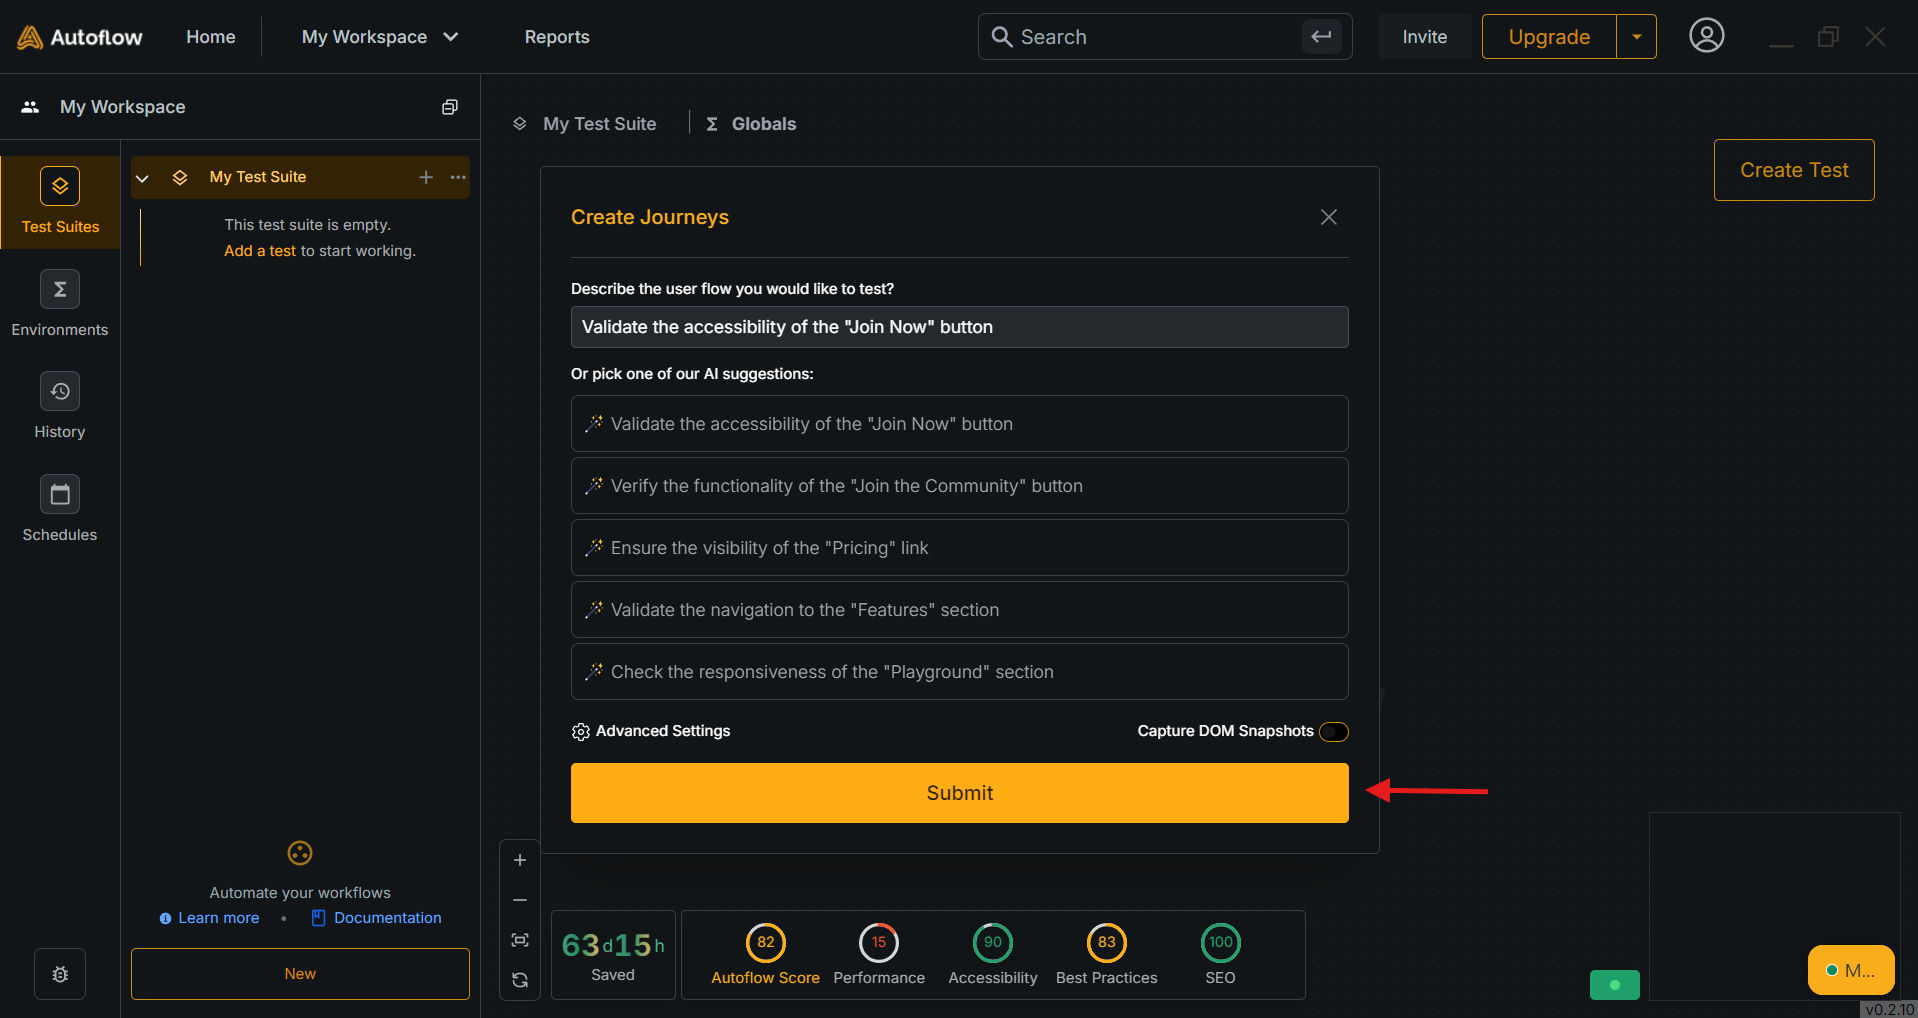
6. AutoFlow Recorder starts
Now the AutoFlow test recorder will open up.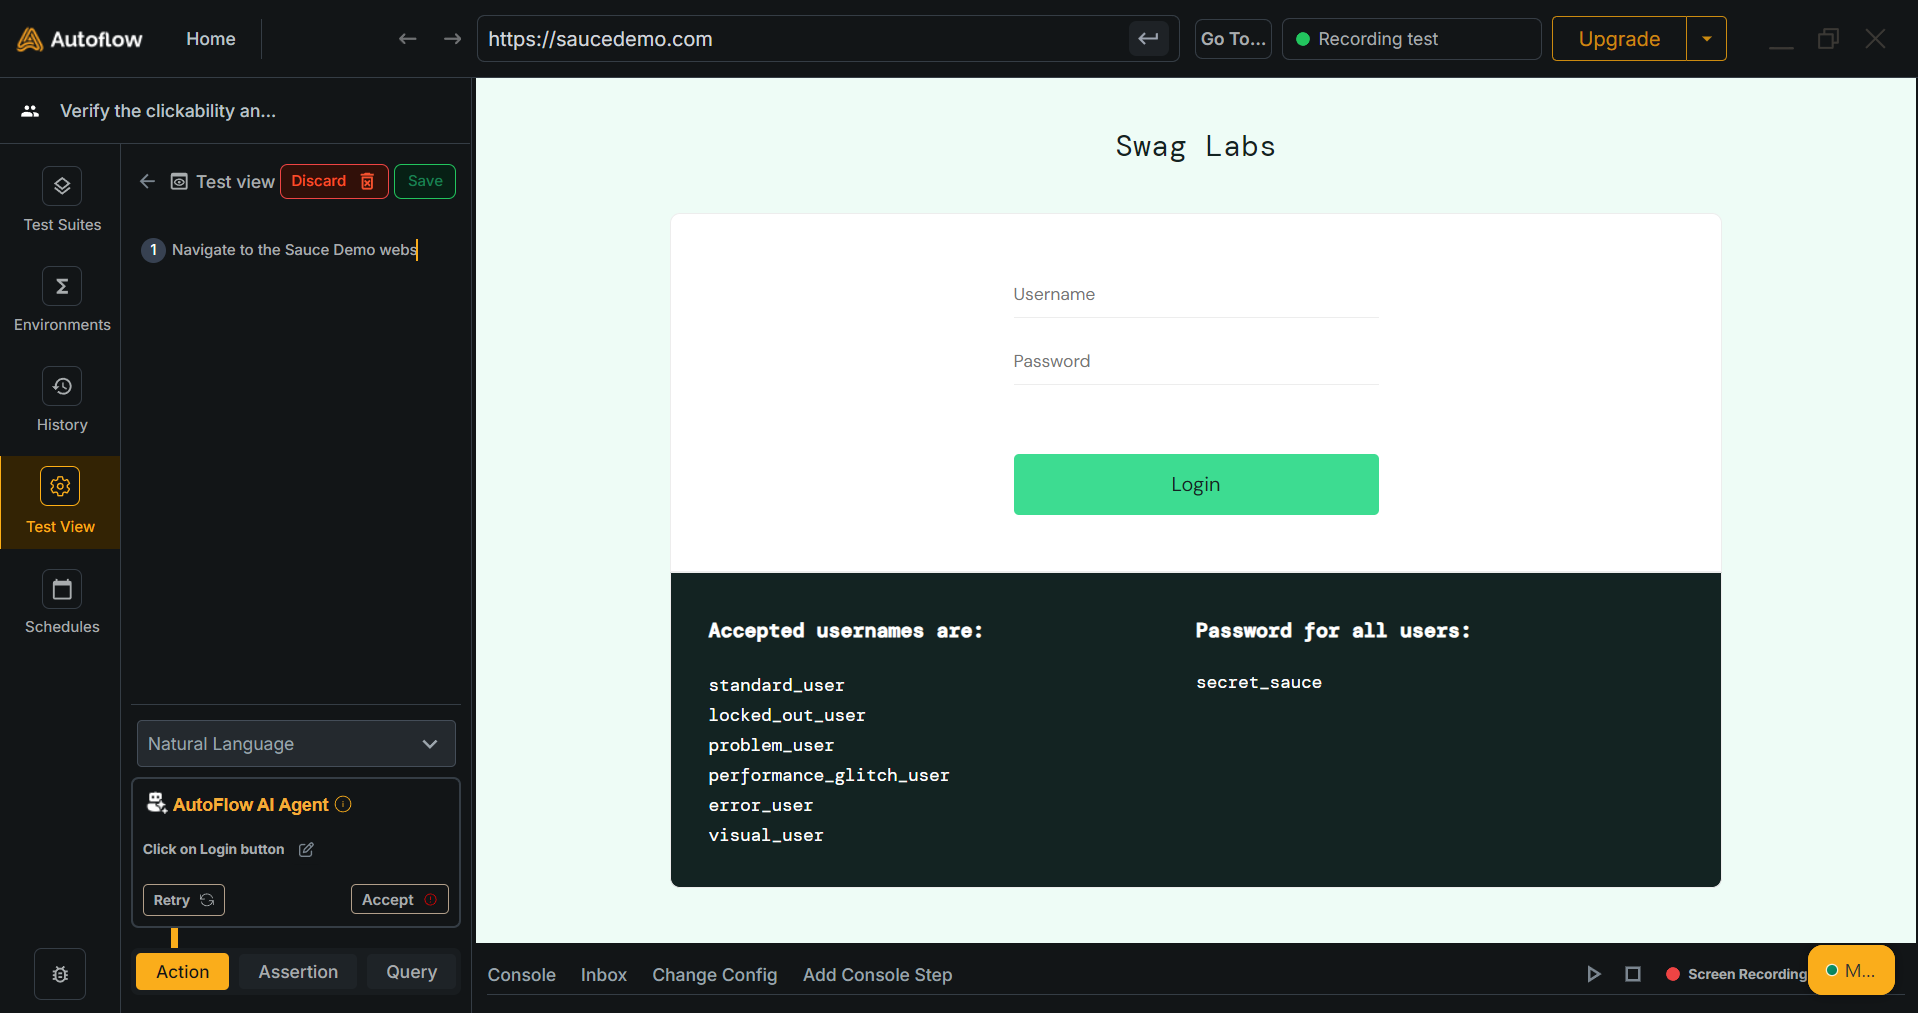
7. Record the steps
Now start recording the steps. The recorder starts with ‘Action Mode’ as default. Every action you do on the screen will be recorded as a step.
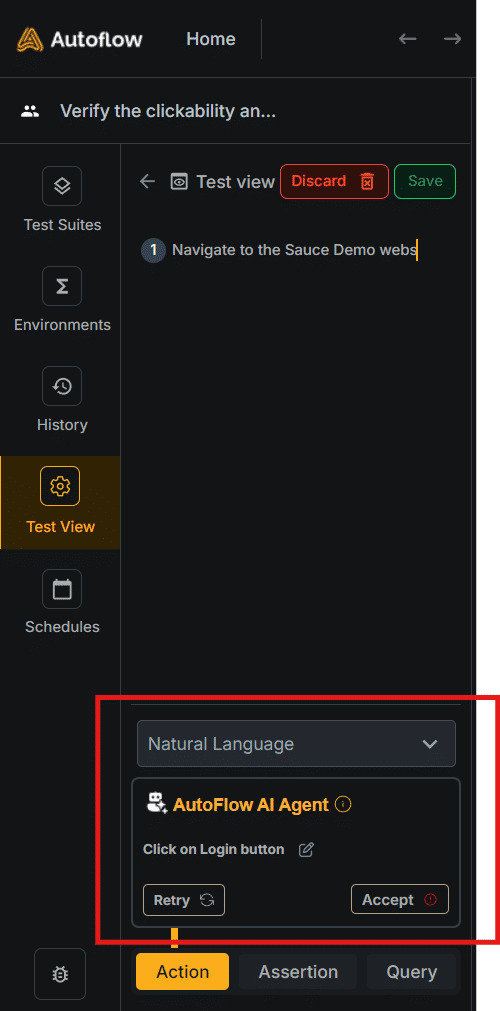
While you’re recording the tests, our AutoFlow AI will keep suggesting you the next steps and highlight the elements on your screen to help you make better decisions. Learn more about AI steps!

8. Switch to Assertion mode
Once you’re done with the actions. You can switch to assertion mode at the bottom left.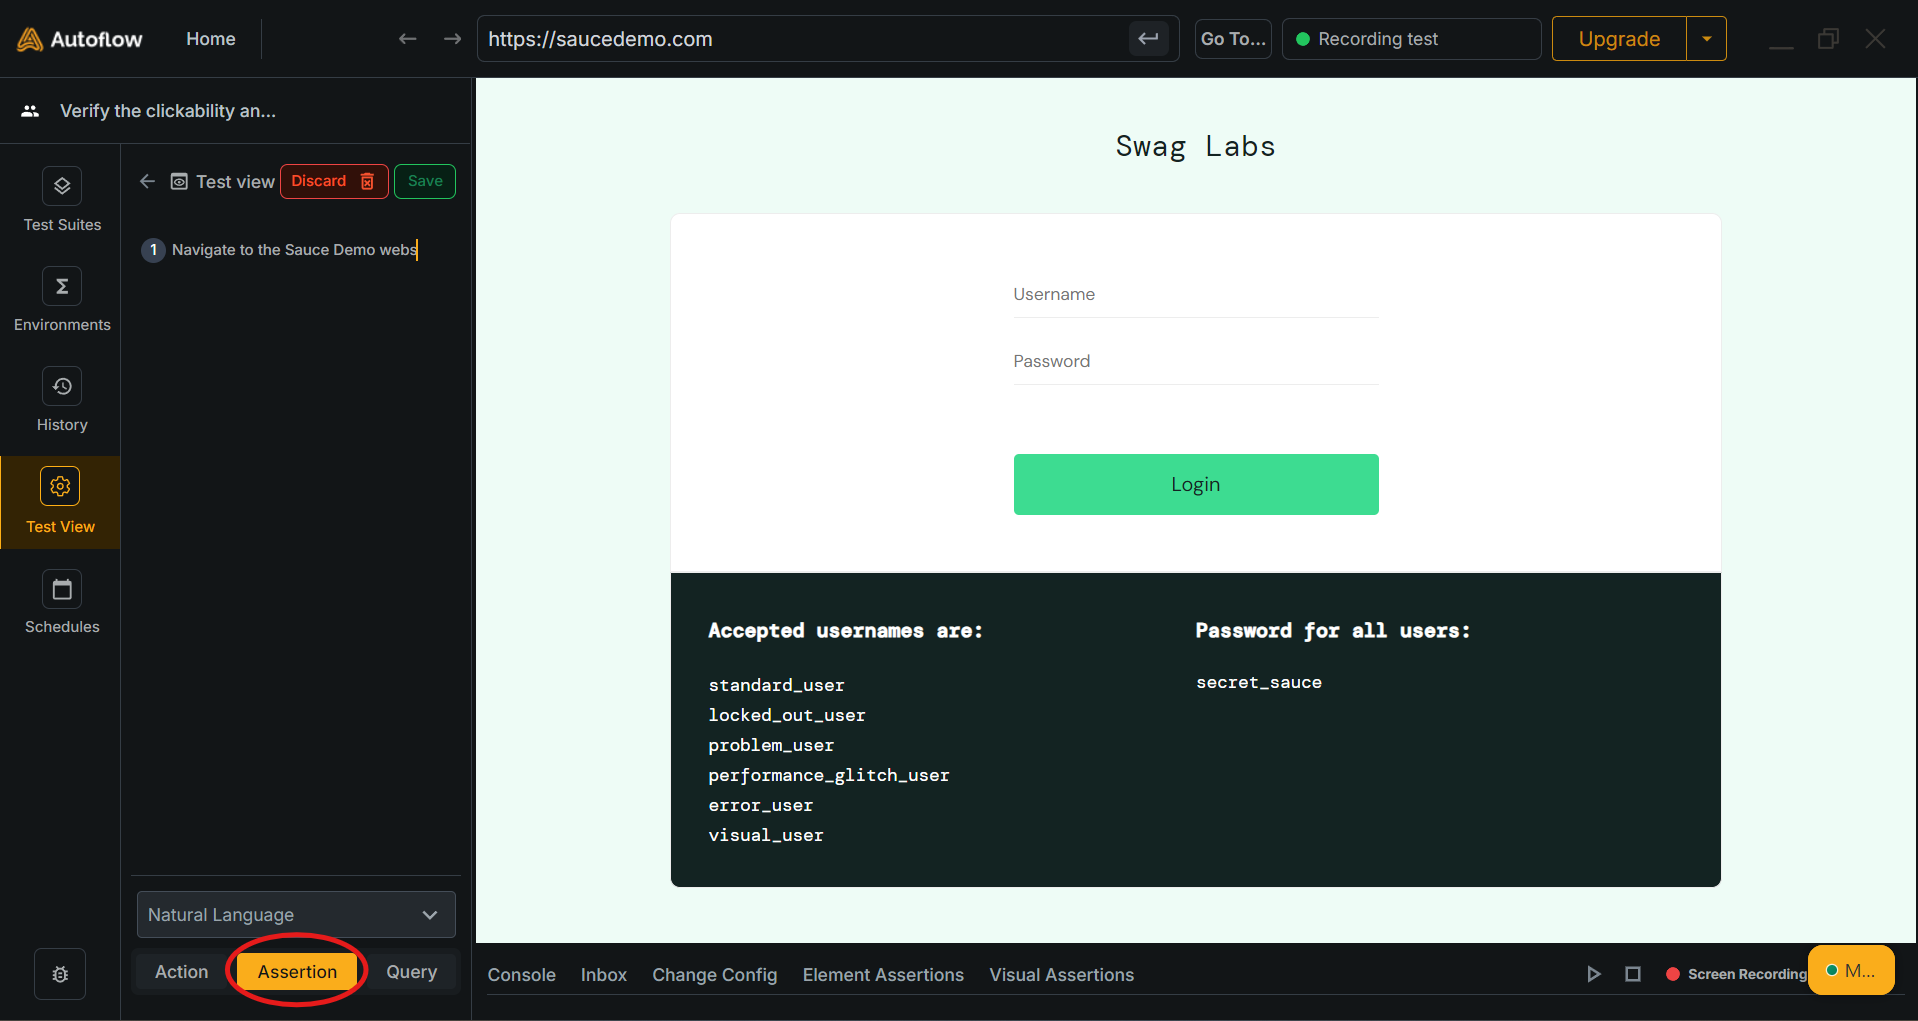
9. Add an assertion
Now hover over the element you want to assert. Eg. validate a certain element is visible on the screen.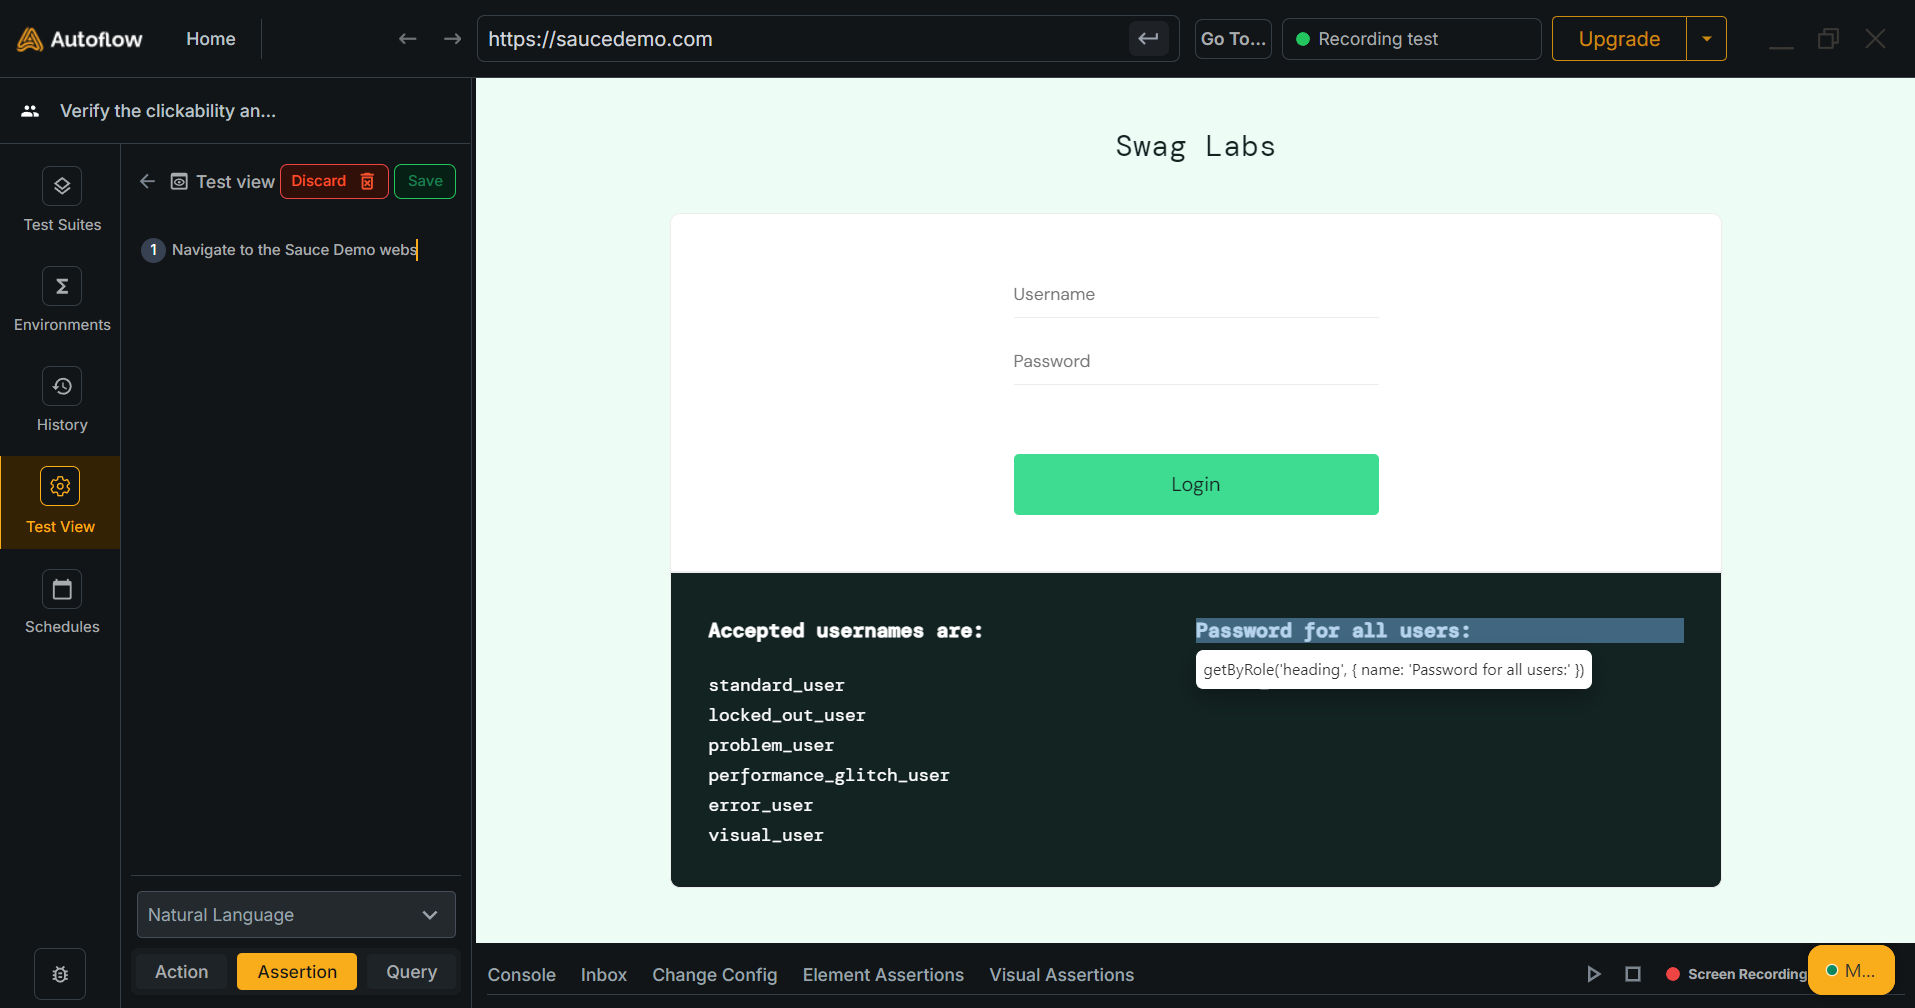
10. Select the assertion type
Select ‘Assert the element is visible’ and click submit.
11. Save the test
Click on ‘Save’ once you’re done recording the test.